Upgrade nodejs to v12
$ sudo apt update
$ sudo apt install nodejs nodejs-dev libssl1.0-dev
$ sudo apt install npm
$ node -v
v8.10.0
$ sudo npm cache clean -f
$ sudo npm install -g n
$ sudo n stable
$ sudo apt purge nodejs
$ sudo apt autoremove
$ exit
$ node -v
v12.14.0
Install Yarn
$ curl -sS https://dl.yarnpkg.com/debian/pubkey.gpg | sudo apt-key add -
$ echo "deb https://dl.yarnpkg.com/debian/ stable main" | sudo tee /etc/apt/sources.list.d/yarn.list
$ sudo apt update
$ sudo apt install yarn
Two more packages needed
$ sudo apt install libxkbfile-dev libsecret-1-dev
https://github.com/cdr/code-server
$ git clone https://github.com/microsoft/vscode
$ cd vscode
$ git checkout ${vscodeVersion} # 1.41.0 for now. See travis.yml for the version to use.
$ yarn
$ git clone https://github.com/cdr/code-server src/vs/server
$ cd src/vs/server
$ yarn
$ yarn patch:apply
$ yarn watch
# Wait for the initial compilation to complete (it will say "Finished compilation").
# Run the next command in another shell.
$ yarn start
# Visit http://localhost:8080
Saturday, December 28, 2019
Monday, November 25, 2019
Black Friday HP Laptop
15 in: 15-cs3065cl
http://h10032.www1.hp.com/ctg/Manual/c06248419
There is a M2 PCIe slot?
14 in
https://slickdeals.net/f/13524451-costco-members-hp-14-laptop-i3-1005g1-4gb-ddr4-128gb-ssd-win-10-s-280-free-shipping
Look for JackT's post on the 4th page for detailed info on upgrades, case open pics, how to open the case, etc.
Link: https://slickdeals.net/f/13524451-costco-members-hp-14-laptop-i3-1005g1-4gb-ddr4-128gb-ssd-win-10-s-280-free-shipping?v=1&p=
Youtube video of removing the bottom cover. Found on RedFlagDeals.
https://www.youtube.com/watch?tim...e=e
HINTS ON REMOVING BOTTOM SCREWS
1. Review Screw locations in JackT's images above.
2. Have the following tools ready:
- guitar pick (thin but firm);
- credit card/gift card;
- precision phillips screwdriver;
- hair dryer
- cleaned hands/fingers
3. Remove the exposed screws (4)
NOTE: the adhesive under the strip (especially the thinner rubber strip farthest from the hinges) is on some plastic, so if that plastic stays on the laptop, you'll need to pry that plastic from over the screw. Happened to me only on the thinner rubber strip, so YMMV.
4. (2 screws) Rubber strip top (near hinges) - left side when hinges are farthest away from you
- Using hair dryer about 1" overtop, heat the left edge to about 4" in (~10 sec)
- using credit card corner edge, push strip edge (horizontally) down to dislodge from base
- pry up corner of strip with credit card once strip dislodged.
- DO NOT TOUCH the Bottom with fingers; stick the bottom of the strip (1/2" worth) on the credit card and peel away slowly exposing both screws on the left side.
- using screwdriver, unscrew both slowly with adequate pressure down but avoiding stripping screws as best as possible.
- grasping the side of the strip, place it back down with the end first - align strip end back to where it was originally and then smooth out the rest of the strip.
- reheat the strip to re-soften the adhesive to stick the strip.
5. (1 screw) Rubber strip top (near hinges) - right side when hinges are farthest away from you
- Using hair dryer about 1" overtop, heat the right edge to about 2" in (~10 sec)
- using credit card corner edge, push strip edge (horizontally) down to dislodge from base
- pry up corner of strip with credit card once strip dislodged.
- DO NOT TOUCH the Bottom with fingers; stick the bottom of the strip (1/2" worth) on the credit card and peel away slowly exposing both screws on the left side.
- using screwdriver, unscrew screw with adequate pressure down but avoiding stripping screw as best as possible.
- grasping the side of the strip, place it back down with the end first - align strip end back to where it was originally and then smooth out the rest of the strip.
- reheat the strip to re-soften the adhesive to stick the strip.
6. (1 screw) Bottom strip - only LEFT side needed when hinges are farthest from you.
- Using hair dryer about 1" overtop, heat the left edge to about 5" in (~10 sec)
- using credit card corner edge, push strip edge (horizontally) up or down to dislodge from base
- pry up corner of strip with credit card once strip dislodged.
- DO NOT TOUCH the Bottom with fingers; stick the bottom of the strip (1/2" worth) on the credit card and peel away slowly exposing the screw on the left side (~3-4" from the left). see note above about plastic adhesive.
- using screwdriver, unscrew screw with adequate pressure down but avoiding stripping screw as best as possible.
- grasping the side of the strip, place it back down with the end first - align strip end back to where it was originally and then smooth out the rest of the strip.
- reheat the strip to re-soften the adhesive to stick the strip.
Once all 8 screws are removed, open the laptop and work the gap in between the bottom cover and keyboard edges. I did the right side and it popped free well. Work your down and around the bottom corner slightly. From there try prying the bottom away a little with fingers. If you get a larger gap, a credit card/gift card can be used. Keep working the edge with the pick until 2 of the 4 sides are free. Then, close the laptop and peel back the plastic bottom to see if the clips become free.
(Slight marring of the silver painted plastic visible, so maybe fold a paper towel over the guitar pick.)
Replacing the cover and screws is just reverse of the above with following the same steps for rubber strip removal. If fixing trackpad, do the fix below before rescrewing.
TRACKPAD METAL STRIP fix:
Remove (4) screws holding battery.
Remove (3) screws holding bottom trackpad rail.
Bend the rail SLIGHTLY concave (viewed from screw tops). Too much will result in non response by buttons. No need to put any crease in the rail.
Before rescrewing everything,
- place the bottom cover on loosely and check the trackpad for feel/rattle/etc.
- place the bottom cover on fully and boot up to check functionality of trackpad.
- if all is good, rescrew bottom cover on.
Positives -
Nice IPS screen, ~57% srgb coverage, 6-bit panel, NON-dithered, it's not dithered to 8bit, Output is 262 thousand colors vs 16.7 million on 8bit types -- This doesn't matter except maybe for photoshop--
Average CPU PassMark = 5929 (if you get the i3)
Average CPU PassMark = 9322 (if you get the i5)
Both of these are quite fast for a budget laptop, and likely to be an upgrade for most who aren't running current-gen i5-8xxx-series desktops or newer.
No major effort to upgrade
It appears the system is on a Intel Core i5-1035G4, and not the i3. Please see page 3-5 for more details.
The display model in Costco is typically an i5; check about this computer . Some have received orders from UPS and booted up showing i5-1035G4 CPU, even though online order says i3.
The i5 in these may have been due to intel not being able deliver enough i3's... Some reports now of new shipments of i3's arriving in stores. YMMV.
HP product page - Drivers and Disassembly manual:-
https://support.hp.com/gb-en/prod...13/manuals
Below are the upgrades that will make this a $450 laptop that will maximize the value of the 10th Gen i5 that IS THE DEAL of this post! Just make sure to remove the crapware and only run Windows Defender.
Best memory upgrade, this will get you to the sweet spot of this machine:
https://www.newegg.com/crucial-16...-_-Product
$50 (2x8; expired): https://www.newegg.com/g-skill-16...-_-Product
$55 (1x16): https://www.newegg.com/g-skill-16...6820232168
Best SSD upgrade factoring reliability, capacity, speed and cost:
https://www.samsung.com/us/comput...7s500b-am/
$60 (same 3x4; 2280; Phison controller): https://www.microcenter
(Newegg BF deal - not live yet) - $83: 1 TB Intel 660p
32GB (2x16) Kingston Hyper-X 3200MHz CL20 [amazon.com] for $201 ($166 open box) is the best RAM Money can buy right now if you can afford it, and the price is worth for 32GB 10th gen intel CPU maxed speed RAM, as 16GB 3200MHz (2x8GB) goes for $110 or so.
you could invest in it now now, keep your 4GB chip the laptop comes in with, and 3-4 years down the road, transfer that 32GB dual channel RAM kit to the next Laptop you buy..
Fan Noise:
First of all this is i5 and powerful, even that is only 15W CPU it will produce heat, that's due to the 4 cores - 8 threads - double the i3. Also HP did poor job with the heatsink as it is too small to draw heat, only 1 fan, most likely pretty bad quality and shallow, good enough for i3 was supposed to ship with i suppose.
That been said, if you really want to make a little bit of temperature drop, google some repaste youtube videos and do that, should drop temps 5°-6° and somehow reduce the need of the fans to run, next:
Obviously debloating will help, because CPU will have to work less, so uninstall programs you won't be using, especially HP stuff and Antivirus.. anything that isn't Microsoft, Windows, Drivers & Updates need to go as a clean start, then:
Quoted kubavance:
I think the general consensus regarding the fan is a little off the mark. We perceive the fan to be loud and obnoxious because of its "whistling" quality, but I'm 99% sure the whistling is not caused by the fan, but rather the design of the exhaust vent. If you take a look at the exhaust vent, you can see that two of the ports are constricted by additional plastic material (see attached). I would bet money that the two smaller exhaust holes are responsible for the whistling. When I cover them up with a credit card, the whistling goes away. I haven't disassembled my laptop yet, but when I do, I'm going to find some way to plug/block the undersized ports. I expect this will take care of the whistling.
I've also successfully applied a -100mv undervolt and capped the turbo speeds on battery. This seems to have helped with the fans a little bit, but I think whatever algorithm controls the fans isn't allowing them to ramp down fully when the CPU idles again after a heavy load. Then again, I am still running the stock OS image, so there could just be a bunch of crap running in the background. I'll do a clean install after I (hopefully) pickup a larger SSD during BF sales.
To turn off the HP services running in background (they are not programs to uninstall) what you need to do is this:
1. Click on start Menu and navigate to "Windows System" folder
2. Expand it and click on "Run" program
3. Type "msconfig" (without the " ") and hit Enter
4. A new window will open, navigate to "Services" Tab
5. Click on the "Status" tab of that window and sort it by Running
6. There you will see the 4 HP Services running, uncheck the boxes:
-HP Analytics service
-HP App Helper HSA Service
-HP Network HSA Service
-HP System Info HSA Service
7. Hit "Apply"
8. Restart
All and all, it does run a bit hot, and the fan is mostly on in any moderate to heavy work or gaming i play some WoW on it, and runs it at 60 frames 1080p on minimal setting with just the 4GB RAM it came with, but does get hot..
For the price of $280+tax it cant be beat, with normal daily task the fans shouldnt be on much at all. there wont be a better deal this BF season, this was like price mistake by $150+
If you using it on a desk, not burning your lap, and dont mind the fans when the CPU is under load its great !!!
Quoted Qubavance:
I'm not going to make assumptions about how much you know about modern processors, so I'll just mention some basics. Ever since the invention of turbo boosting, pretty much all processors "throttle" under load. The CPU uses a complicated algorithm to determine which frequency each core should run at in any given moment. The algorithm takes into account power limits and temperature sensor data and the duration of heavy workloads, among other things.
Intel and to a lesser extent the device manufacturer can set power limits for the processor to make sure the processor can run safely in a given chassis. These are known as PL1 and PL2. The CPU can only run in PL2 for a limited time (we're talking seconds or minutes) before it has to throttle back to PL1 to maintain reasonable temperatures. From my very limited testing, it would appear that PL2 for this laptop is set at around 26W, and PL1 is around 18W. Remember, this is a 15W processor.
The new Dell XPS 13 2-in-1 has the Core i7 version of the same Ice Lake processor found in this HP, only its configured for 25W. This means that the Dell chassis has theoretically been designed to dissipate at least 10W more of heat. It's also an $1,800 laptop with 16GB of memory. It should have a huge advantage. According to notebookcheck's review (https://www.notebookche
I just ran Cinebench R15 about 10 times in a row on my HP 14 and got about 580 consistently (first run was about 600). CPU power held steady at 18W and temperatures hovered around 75 degrees Celsius. That's not throttling--that's working as designed.
Are you really that disappointed that your $280 laptop (with a HUGE RAM disadvantage) only scores within 10-15% of an $1800 Dell?
Update your Bios from F.04 to F.07.
Start Menu > Device Manager > System Firmware > Update Driver
F.07 Bios is not listed at HP support site, so we don,t have a change log yet.
For those encountering issues with the touchpad driver and 1909 on a fresh install its a SUPER easy fix:
download the latest touchpad driver from here:
https://support.hp.com/gb-en/driv...l/31046513
Then attempt to install the driver (it will eventually fail saying something about it not being compatible with the OS.
Close the prompt and then go into C:\swsetup\SP99388
Then right click edit the Install.cmd (may only show up as Install) file located in that directory
Once you have that file open change This:
https://imgur.com/a/Jhj4Bvv
to this:
https://imgur.com/a/CH3r894
All you do is edit the "19H1" to say "19H2" and the two locations where it says "10.0.18362" to "10.0.18363"
Save your changes and launch HPSetup.exe, once thats done reboot and bam no more errors in the device manager.
OVERALL APPROX UPGRADE COSTS
DIY upgrades
- add single stick 8GB RAM ($35); 16GB RAM ($55)
- add m.2 SSD (256GB: $40; 512GB: $60; or 1TB: $99)
RESULT (depending on how you DIY upgrade):
1080p, 10th Gen (Ice Lake) i5-1035G4, 12GB RAM, 256TB SSD: $355 + tax
1080p, 10th Gen (Ice Lake) i5-1035G4, 12GB RAM, 512TB SSD: $375 + tax
1080p, 10th Gen (Ice Lake) i5-1035G4, 12GB RAM, 1TB SSD: $415 + tax
1080p, 10th Gen (Ice Lake) i5-1035G4, 20GB RAM, 256TB SSD: $375 + tax
1080p, 10th Gen (Ice Lake) i5-1035G4, 20GB RAM, 512TB SSD: $395 + tax
1080p, 10th Gen (Ice Lake) i5-1035G4, 20GB RAM, 1TB SSD: $435 + tax
Tuesday, October 15, 2019
wsl 2 + vs code build & debug
c_cpp_properties.json:
{
"configurations": [
{
"name": "Linux",
"includePath": [
"${workspaceFolder}/**"
],
"defines": [],
"compilerPath": "/usr/bin/g++",
"cStandard": "c11",
"cppStandard": "c++11",
"intelliSenseMode": "gcc-x64"
}
],
"version": 4
}
tasks.json:
{
"version": "2.0.0",
"windows": {
"options": {
"shell": {
"executable": "bash.exe",
"args": [
"-c"
]
}
}
},
"tasks": [
{
"label": "build thread example on WSL",
"type": "shell",
"command": "g++",
"args": [
"-g",
"-pthread",
"-o",
"/home/x/0work/c++/thread/a.out",
"test.cc"
],
"group": {
"kind": "build",
"isDefault": true
}
},
{
"type": "shell",
"label": "g++ build active file",
"command": "/usr/bin/g++",
"args": [
"-g",
"${file}",
"-o",
"${fileDirname}/${fileBasenameNoExtension}"
],
"options": {
"cwd": "/usr/bin"
}
}
]
}
launch.json:
{
// Use IntelliSense to learn about possible attributes.
// Hover to view descriptions of existing attributes.
// For more information, visit: https://go.microsoft.com/fwlink/?linkid=830387
"version": "0.2.0",
"configurations": [
{
"name": "g++ build and debug active file",
"type": "cppdbg",
"request": "launch",
"program": "/home/x/0work/c++/thread/a.out",
"args": [""],
"stopAtEntry": true,
"cwd": "/home/x/0work/c++/thread/",
"environment": [],
"externalConsole": true,
"windows" : {
"MIMode": "gdb",
"miDebuggerPath": "/usr/bin/gdb",
"setupCommands": [
{
"description": "Enable pretty-printing for gdb",
"text": "-enable-pretty-printing",
"ignoreFailures": true
}
]
},
"pipeTransport": {
"pipeCwd": "",
"pipeProgram": "/bin/bash",
"pipeArgs": ["-c"],
"debuggerPath": "/usr/bin/gdb"
},
"sourceFileMap": {
"/c": "${env:systemdrive}/",
"/usr": "C:\\Users\\<path to WSL directory which you will place here later>"
}
}
]
}
{
"configurations": [
{
"name": "Linux",
"includePath": [
"${workspaceFolder}/**"
],
"defines": [],
"compilerPath": "/usr/bin/g++",
"cStandard": "c11",
"cppStandard": "c++11",
"intelliSenseMode": "gcc-x64"
}
],
"version": 4
}
tasks.json:
{
"version": "2.0.0",
"windows": {
"options": {
"shell": {
"executable": "bash.exe",
"args": [
"-c"
]
}
}
},
"tasks": [
{
"label": "build thread example on WSL",
"type": "shell",
"command": "g++",
"args": [
"-g",
"-pthread",
"-o",
"/home/x/0work/c++/thread/a.out",
"test.cc"
],
"group": {
"kind": "build",
"isDefault": true
}
},
{
"type": "shell",
"label": "g++ build active file",
"command": "/usr/bin/g++",
"args": [
"-g",
"${file}",
"-o",
"${fileDirname}/${fileBasenameNoExtension}"
],
"options": {
"cwd": "/usr/bin"
}
}
]
}
launch.json:
{
// Use IntelliSense to learn about possible attributes.
// Hover to view descriptions of existing attributes.
// For more information, visit: https://go.microsoft.com/fwlink/?linkid=830387
"version": "0.2.0",
"configurations": [
{
"name": "g++ build and debug active file",
"type": "cppdbg",
"request": "launch",
"program": "/home/x/0work/c++/thread/a.out",
"args": [""],
"stopAtEntry": true,
"cwd": "/home/x/0work/c++/thread/",
"environment": [],
"externalConsole": true,
"windows" : {
"MIMode": "gdb",
"miDebuggerPath": "/usr/bin/gdb",
"setupCommands": [
{
"description": "Enable pretty-printing for gdb",
"text": "-enable-pretty-printing",
"ignoreFailures": true
}
]
},
"pipeTransport": {
"pipeCwd": "",
"pipeProgram": "/bin/bash",
"pipeArgs": ["-c"],
"debuggerPath": "/usr/bin/gdb"
},
"sourceFileMap": {
"/c": "${env:systemdrive}/",
"/usr": "C:\\Users\\<path to WSL directory which you will place here later>"
}
}
]
}
Sunday, September 29, 2019
Min # of Coins, ternary tree
Given an amount of cents, what is the minimum number of coins needed to get the amount?
Version #1
# coin.py
# preorder: root, left (25), mid (10), right (9)
total = 30
totalCoin = 0
minCoin = 100
def preorder(leftOver, direction):
global totalCoin
global minCoin
print ("minCoin ", minCoin, " : totalCoin ", totalCoin, " : leftOver ", leftOver, " : direction ", direction)
if (leftOver > 0):
totalCoin +=1
preorder(leftOver - 25, 1)
preorder(leftOver - 10, 0)
preorder(leftOver - 1, -1)
else:
if (leftOver == 0):
if (minCoin > totalCoin):
minCoin = totalCoin
if (direction == -1):
totalCoin -= 1
return
preorder(total, 1)
Version #2: prevent from going back to left if mid/right
# coin.py
# root, left (25), mid (10), right (9)
# preorder: root, left, mid, right
total = 30
totalCoin = 0
minCoin = 100
def preorder(leftOver, direction):
global totalCoin
global minCoin
print ("minCoin ", minCoin, " : totalCoin ", totalCoin, " : leftOver ", leftOver, " : direction ", direction)
if (leftOver > 0):
totalCoin +=1
if (direction > 0) :
preorder(leftOver - 25, 1)
if (direction > -1) :
preorder(leftOver - 10, 0)
preorder(leftOver - 1, -1)
else:
if (leftOver == 0):
if (minCoin > totalCoin):
minCoin = totalCoin
if (direction == -1):
totalCoin -= 1
return
preorder(total, 1)
Version #3: stop early
# coin.py
# root, left (25), mid (10), right (9)
# preorder: root, left, mid, right
total = 30
totalCoin = 0
minCoin = 100
def preorder(leftOver, direction):
global totalCoin
global minCoin
print ("minCoin ", minCoin, " : totalCoin ", totalCoin, " : leftOver ", leftOver, " : direction ", direction)
if (totalCoin < minCoin):
if (leftOver > 0):
totalCoin +=1
if (direction > 0) :
preorder(leftOver - 25, 1)
if (direction > -1) :
preorder(leftOver - 10, 0)
preorder(leftOver - 1, -1)
else:
if (leftOver == 0):
if (minCoin > totalCoin):
minCoin = totalCoin
if (direction == -1):
totalCoin -= 1
return
preorder(total, 1)
Tuesday, September 3, 2019
python3 Atlassian REST API Wrapper
This summary is not available. Please
click here to view the post.
Monday, August 5, 2019
Tuesday, July 23, 2019
Learning to See in the Dark by Chen Chen et. al.
https://www.youtube.com/watch?v=bcZFQ3f26pA
http://cchen156.web.engr.illinois.edu/SID.html
https://arxiv.org/abs/1805.01934
Note: Need 250GB disck space.
sudo apt install python
curl https://bootstrap.pypa.io/get-pip.py -o get-pip.py
sudo python get-pip.py
sudo pip install tensorflow
git clone https://github.com/cchen156/Learning-to-See-in-the-Dark.git
cd Learning-to-See-in-the-Dark/
sudo pip install requests
python download_models.py
python download_dataset.py
sudo pip install scipy
sudo pip install rawpy
python test_Fuji.py
Wednesday, May 15, 2019
Yocto SRCREV override
In our Yocto build, there are a few customized packages. It is a pain to update SRCREV in multiple bb files individually.
It turns out, in either local.conf or any top level conf / bb files, people can specify
Then, in the corresponding recipe bb file, just change
to
This works for both applications and the Linux kernel / U-Boot.
file: /poky/bitbake/lib/bb/fetch2/__init__.py
https://stackoverflow.com/questions/42093482/how-to-conditionally-specify-a-variable-in-yocto-bb-recipe
In addition, it is also possible to create machine based SRCREV.
It turns out, in either local.conf or any top level conf / bb files, people can specify
- SRCREV_default_pn-${recipe name} ?= "XXXX"
Then, in the corresponding recipe bb file, just change
- SRCREV = "XXXXX"
to
- SRCREV ?= "XXXXX"
This works for both applications and the Linux kernel / U-Boot.
file: /poky/bitbake/lib/bb/fetch2/__init__.py
https://stackoverflow.com/questions/42093482/how-to-conditionally-specify-a-variable-in-yocto-bb-recipe
In addition, it is also possible to create machine based SRCREV.
Tuesday, April 2, 2019
yocto trust boot
https://elinux.org/images/e/e0/Josserand-schulz-secure-boot.pdf
https://www.linux.com/news/event/open-source-summit-na/2017/4/pros-and-cons-system-update-and-integrity-protection-schemes
EMMC: Replay Protected Memory Block (RPMB)
https://www.jedec.org/sites/default/files/Victo_Tsai(1).pdf
https://manpages.debian.org/unstable/mmc-utils/mmc.1.en.html
mmc rpmb write-key <rpmb device> <key file>
Program authentication key which is 32 bytes length and stored
in the specified file. Also you can specify '-' instead of
key file path to read the key from stdin.
NOTE! This is a one-time programmable (unreversible) change.
Example:
$ echo -n AAAABBBBCCCCDDDDEEEEFFFFGGGGHHHH | \
mmc rpmb write-key /dev/mmcblk0rpmb -
mmc rpmb read-counter <rpmb device>
Counter value for the <rpmb device> will be read to stdout.
mmc rpmb read-block <rpmb device> <address> <blocks count> <output file> [key file]
Blocks of 256 bytes will be read from <rpmb device> to output
file or stdout if '-' is specified. If key is specified - read
data will be verified. Instead of regular path you can specify
'-' to read key from stdin.
Example:
$ echo -n AAAABBBBCCCCDDDDEEEEFFFFGGGGHHHH | \
mmc rpmb read-block /dev/mmcblk0rpmb 0x02 2 /tmp/block -
or read two blocks without verification
$ mmc rpmb read-block /dev/mmcblk0rpmb 0x02 2 /tmp/block
mmc rpmb write-block <rpmb device> <address> <256 byte data file> <key file>
Block of 256 bytes will be written from data file to
<rpmb device>. Also you can specify '-' instead of key
file path or data file to read the data from stdin.
Example:
$ (awk 'BEGIN {while (c++<256) printf "a"}' | \
echo -n AAAABBBBCCCCDDDDEEEEFFFFGGGGHHHH) | \
mmc rpmb write-block /dev/mmcblk0rpmb 0x02 - -
IMA/EVM
https://elinux.org/images/2/2e/2017_ELC_Integrity_System_Update.pdf
EVM tied to per-machine key
Does not protect integrity of directory content and therefore susceptible to offline attacks
- Disable services by removing filles
- Replace trusted content with symlinks to untrusted content
DM-Verity
... add this
Monday, March 4, 2019
The problem with wireless bridging by Flameeyes
ILNP:
https://tools.ietf.org/html/rfc6747
=========================
Each Ethernet switch port can have multiple MAC address associated.
https://wiki.dd-wrt.com/wiki/index.php/Wireless_Bridge
Limitation section
https://tools.ietf.org/html/rfc6747
=========================
Each Ethernet switch port can have multiple MAC address associated.
http://www.pearsonitcertification.com/articles/article.aspx?p=2474237&seqNum=2
https://wiki.dd-wrt.com/wiki/index.php/Wireless_Bridge
Limitation section
BrainSlayer Forum Answer [1] : "Client Bridge mode will only recognize one mac address on the bridged setup, due a limitation in the 802.11 protocol, even if there are multiple clients (with multiple mac addresses) connected to the client router. If you want to bridge a full LAN you must use WDS. The problem is that the 802.11 protocol just supports one MAC address, but in a LAN there is the possibility for more than one MAC address. It may cause ARP table problems, if you connect more than one computer on the far end of a Client Bridge mode setup. You will not be able to, for example, block mac addresses of client of the bridged routers or set access restrictions based on mac addresses in the bridged router.
bobn: Multiple devices on the wireless bridge seem to work fine, including using DHCP to the 'server' AP. Although multiple devices on the client bridge (wireless bridge) appear to have the same MAC address in the arp tables of devices on the 'server' AP, something in the wireless bridge translates that MAC address on return traffic back to the correct one for a given device's IP address behind the bridge. (I suspect that there is enough of the routing function still turned on in the client bridge mode to maintain an arp table local to the client bridge and make the translations.) Most protocols (ICMP, UDP, TCP) seem to work fine for multiple devices on the bridge, based on some quick testing. I would not want to count on multiple devices using non-IP protocols, and would be suspicious of things using special MAC addresses such as multicast addresses (eg OSPF routers, multicast apps).
https://flameeyes.blog/2011/12/15/the-problem-with-wireless-bridging/
The problem with wireless bridging
I want to pick up where I left with my previous post and expand a bit upon the issue with wireless bridging, and why “just use dd-wrt” is not an answer to the problem.
As I said a number of issues I learnt the hard way, by trying to get them to work… and failing. In particular, there is a limitation in 802.11, that even the dd-wrt documentationnotes:
Client Bridge mode will only recognize one mac address on the bridged setup, due a limitation in the 802.11 protocol, even if there are multiple clients (with multiple mac addresses) connected to the client router. If you want to bridge a full LAN you must use WDS. The problem is that the 802.11 protocol just supports one MAC address, but in a LAN there is the possibility for more than one MAC address. It may cause ARP table problems, if you connect more than one computer on the far end of a Client Bridge mode setup. You will not be able to, for example, block mac addresses of client of the bridged routers or set access restrictions based on mac addresses in the bridged router
This is actually putting it more bright than it is. Anything relying on proper mac address communication will fail. Indeed, if you wish to use a single DHCP server, your only choice is to run
dhrelay on the bridge itself. And that’s not a good idea.
Due to the fact that 802.11 decides where to send the packets depending on the mac address, you only have two choices for this to work: you either go with what OpenRG/Linksys do, and translate addresses at second level (with probably a dhrelay to make sure that dhcp still works), or you do what D-Link did with the DAP-1160 and create a custom work mode, which I guess encapsulates the packets to preserve their addresses (I could probably have tried AP+Bridge mode and sniffed the traffic to find that out but I didn’t care), probably something along the lines of a generic Ethernet-in-Ethernet encapsulation.
Interestingly enough, there is an RFC describing Ethernet-in-IP encapsulation, and then there is a patch for Linux 2.6.10 that implements it .. it would be quite an interesting approach, to have the router listen to an EtherIP device, and have another EtherIP device here to encapsulate the packets.. unfortunately this would still require a very shallow router up here, which is what I’m trying to avoid altogether. And as it happens, looks like the patch never made it to the Kernel, and the author’s website seems to be gone as well (the domain does not have an answering webserver, even though the whois data confirms its registration .. I should try to see if the email address is still valid or not — there is a valid mx record and an answering mail server at least).
I guess I can add this to the long list of projects I’ll work with once I made enough money not to have to work twelve hours a day to pay the bills…
Sunday, March 3, 2019
ubuntu 18.04 / 20.04 xrdp
download 18.04 server ISO
use unetbootin 661 write USB
Install w/o any server package (minimal)
$sudo apt update
$lsb_release -a
$hostname -I
$hostname
$getconf LONG_BIT
$sudo apt-get install xrdp
$sudo apt update
$sudo apt-get install mate-core
$sudo apt-get install mate-desktop-environment
$sudo su
#sed -i.bak '/fi/a #xrdp multiple users configuration \n mate-session \n' /etc/xrdp/startwm.sh
#exit
$diff xrdp/startwm.sh /etc/xrdp/startwm.sh
$sudo ufw allow 3389/tcp
$sudo /etc/init.d/xrdp restart
From Windows 10, mstsc (remote desktop) can connect to the server
Ubuntu 20.04
https://github.com/neutrinolabs/xrdp/issues/1358
$sudo apt-get install xrdp
$sudo systemctl enable --now xrdp
$sudo ufw allow from any to any port 3389 proto tcp
$ systemctl status colord
● colord.service - Manage, Install and Generate Color Profiles
Loaded: loaded (/lib/systemd/system/colord.service; static; vendor preset: enabled)
Active: active (running) since Sun 2020-05-24 11:49:50 EDT; 1h 8min ago
Main PID: 2252 (colord)
Tasks: 3 (limit: 4915)
CGroup: /system.slice/colord.service
└─2252 /usr/lib/colord/colord
May 24 11:50:50 u18ai colord[2252]: failed to get seat for session c3 [pid 2871]: No data available
May 24 11:50:50 u18ai colord[2252]: failed to get seat for session c3 [pid 3071]: No data available
May 24 11:53:07 u18ai colord[2252]: failed to get seat for session c4 [pid 3517]: No data available
May 24 11:53:08 u18ai colord[2252]: failed to get seat for session c4 [pid 3668]: No data available
May 24 12:11:24 u18ai colord[2252]: failed to get seat for session c5 [pid 4923]: No data available
May 24 12:11:24 u18ai colord[2252]: failed to get seat for session c5 [pid 5081]: No data available
May 24 12:55:35 u18ai colord[2252]: failed to get seat for session c6 [pid 6575]: No data available
May 24 12:55:35 u18ai colord[2252]: failed to get seat for session c6 [pid 6719]: No data available
May 24 12:56:08 u18ai colord[2252]: failed to get seat for session c7 [pid 7190]: No data available
May 24 12:56:09 u18ai colord[2252]: failed to get seat for session c7 [pid 7352]: No data available
Loaded: loaded (/lib/systemd/system/colord.service; static; vendor preset: enabled)
Active: active (running) since Sun 2020-05-24 12:59:50 EDT; 2s ago
Main PID: 11270 (colord)
Tasks: 9 (limit: 4915)
CGroup: /system.slice/colord.service
├─11270 /usr/lib/colord/colord
└─11283 /usr/lib/colord/colord-sane
May 24 12:59:50 u18ai systemd[1]: Starting Manage, Install and Generate Color Profiles...
May 24 12:59:50 u18ai systemd[1]: Started Manage, Install and Generate Color Profiles.
use unetbootin 661 write USB
Install w/o any server package (minimal)
$sudo apt update
$lsb_release -a
$hostname -I
$hostname
$getconf LONG_BIT
$sudo apt-get install xrdp
$sudo apt update
$sudo apt-get install mate-core
$sudo apt-get install mate-desktop-environment
$sudo su
#sed -i.bak '/fi/a #xrdp multiple users configuration \n mate-session \n' /etc/xrdp/startwm.sh
#exit
$diff xrdp/startwm.sh /etc/xrdp/startwm.sh
$sudo ufw allow 3389/tcp
$sudo /etc/init.d/xrdp restart
From Windows 10, mstsc (remote desktop) can connect to the server
Ubuntu 20.04
https://github.com/neutrinolabs/xrdp/issues/1358
$sudo apt-get install xrdp
$sudo systemctl enable --now xrdp
$sudo ufw allow from any to any port 3389 proto tcp
unset DBUS_SESSION_BUS_ADDRESS

unset XDG_RUNTIME_DIR

. $HOME/.profile


By adding the above lines just before the test and exec in /etc/xrdp/startwm.sh, I also added the #!/bin/bash to the top of the file - also doing a chmod after you've changed the file is what some users might be forgetting.
Basically adding the line:
X-GNOME-
X-GNOME-
To the files:
/etc/xdg/
/usr/share/
/etc/xdg/
/usr/share/
Then stop and disable the service:
$ sudo systemctl stop spice-vdagentd
$ sudo systemctl disable spice-vdagentd
● colord.service - Manage, Install and Generate Color Profiles
Loaded: loaded (/lib/systemd/system/colord.service; static; vendor preset: enabled)
Active: active (running) since Sun 2020-05-24 11:49:50 EDT; 1h 8min ago
Main PID: 2252 (colord)
Tasks: 3 (limit: 4915)
CGroup: /system.slice/colord.service
└─2252 /usr/lib/colord/colord
May 24 11:50:50 u18ai colord[2252]: failed to get seat for session c3 [pid 2871]: No data available
May 24 11:50:50 u18ai colord[2252]: failed to get seat for session c3 [pid 3071]: No data available
May 24 11:53:07 u18ai colord[2252]: failed to get seat for session c4 [pid 3517]: No data available
May 24 11:53:08 u18ai colord[2252]: failed to get seat for session c4 [pid 3668]: No data available
May 24 12:11:24 u18ai colord[2252]: failed to get seat for session c5 [pid 4923]: No data available
May 24 12:11:24 u18ai colord[2252]: failed to get seat for session c5 [pid 5081]: No data available
May 24 12:55:35 u18ai colord[2252]: failed to get seat for session c6 [pid 6575]: No data available
May 24 12:55:35 u18ai colord[2252]: failed to get seat for session c6 [pid 6719]: No data available
May 24 12:56:08 u18ai colord[2252]: failed to get seat for session c7 [pid 7190]: No data available
May 24 12:56:09 u18ai colord[2252]: failed to get seat for session c7 [pid 7352]: No data available
$ sudo apt install snmp-mibs-downloader
$ sudo systemctl restart colord
● colord.service - Manage, Install and Generate Color ProfilesLoaded: loaded (/lib/systemd/system/colord.service; static; vendor preset: enabled)
Active: active (running) since Sun 2020-05-24 12:59:50 EDT; 2s ago
Main PID: 11270 (colord)
Tasks: 9 (limit: 4915)
CGroup: /system.slice/colord.service
├─11270 /usr/lib/colord/colord
└─11283 /usr/lib/colord/colord-sane
May 24 12:59:50 u18ai systemd[1]: Starting Manage, Install and Generate Color Profiles...
May 24 12:59:50 u18ai systemd[1]: Started Manage, Install and Generate Color Profiles.
Thursday, February 28, 2019
Clair Patterson
https://mag.uchicago.edu/science-medicine/immeasurable#
WiKi
https://en.wikipedia.org/wiki/Clair_Cameron_Patterson
Interview
http://oralhistories.library.caltech.edu/32/1/OH_Patterson.pdf
Eulogy
https://www.nytimes.com/1995/12/08/us/clair-c-patterson-who-established-earth-s-age-is-dead-at-73.html
http://www.hutong9.net/forum.php?mod=viewthread&tid=409519
为了完成老师的作业,他在不经意间拯救了世界
水5郎 waterfive 知乎日报 2019-02-27
题图:《宇宙时空之旅》
有人在不经意间或是在世界上绝大部分人都毫不知情的情况下拯救了世界吗?
知友:水5郎 waterfive(51,000+ 赞同,动画话题的优秀回答者)
这个问题的迷人之处在于那种历史的微妙的偶然性,像一个放在针尖上的平衡的玻璃瓶,或许就差那么一点点就会碎落掉在地上。但是历史是不能假设的,所以让后人看起来唏嘘不已和庆幸。
上世纪中,一个长相平凡,毫无任何存在感,丢在人群中马上找不到的苦逼理工科的研究生,他的毕设研究,经过漫长的跋涉,不经意发现一个伟大的问题的答案。
这个答案对地球上 99.99999% 的人来说没有什么实际意义,但是他却自己不知道自己的这个没有实际意义研究结论,由此得罪了世界上最有权势的人!
然而他坚持对这个答案的追寻和对真理的坚持,在经过 20 年对世界上最有权势人的抗争,改变了我们生活中非常非常重要的一个东西,可以说这个东西的改变,间接拯救了地球上数以亿计的人!他由此成为一个在自己学科 20 世纪最伟大的人!
但是他的低调不仅 99.9999999% 的人都没听说过他的名字,更是据说在他本学科的教科书上,也几乎没有占到多大的篇幅,但是不妨碍他成为一个拯救世界的英雄。
而且他的故事告诉我们,英雄不是超人,不会空手停火车,拯救世界也不一定是一瞬间的事情,他不经意的拯救世界花费了将近三十年,但是改变了数亿人的生命。
本文截图来自 2014 年 FOX 和国家地理联合制作的 3 亿美金的纪录片巨作:《宇宙时空之旅》(COSMOS:A SPACETIME ODYSSEY)第七集,这部纪录片我的评价是:「这才是我心中的三体特效」。
20 世纪 40 年代,刚结束二战,芝加哥大学的地质教授哈里森·布朗突发一个设想,觉得十分有趣,但是也仅仅停留在有趣上。
这个问题并不能有足够的诱惑力去亲自探寻,花费他自己的宝贵研究时间,所以他选择了一个两全其美的方法,抓了学校的一个研究生当小苦力,让他去研究这个问题:
研究生名叫克莱尔·帕特森,爱荷华州一位邮递员的儿子,天性叛逆,学校表现一般,人长得也又土又挫,丢人群里也马上会看不见。
动画里帕特森长的是这样
当时哈里森布朗「哄骗」克莱尔·帕特森去做他这个项目时这么说:
「小帕,唉,你不介意我叫你小帕不。」
帕特森呆萌木讷的点点头。
「你结婚没有?」
「我结婚了,我妻子劳拉是一个化学家,我们曾经一起给曼哈顿计划打过工。」
哈里森满意的笑了:「很好很好,小帕~嘿嘿,我知道你不是地质学家,很可能还分不清长石和花岗岩,但是我听说你使用质谱仪很在行?小帕?」
帕特森再次呆萌的点点头。
「小帕,这些是锆石,比针尖还小,里面有很少量的铅,我希望你能测量出这些锆石里面铅同位素的丰度。」
帕特森呆呆的看着老师,因为他不是这个专业的,不知道要不要接受做这个小作业。
哈里森一看他的迟疑,马上拿出他的招牌本领,他一本正经语重心长的说:
「小帕!!这可不是一个简单的作业啊!」
帕特森看着老师,很好奇。
哈里森继续说:
「如果成功测量出在锆石中的的铅同位素丰度,你就能用相同方法测量陨石中的铅同位素丰度。」
哈里森顿了顿,压低了声音深邃的说:
「你如果这个 Thesis 成功了,You Will Be Famous!」哈里森把 Famous 加了重音,「因为你将会是测量出地球年龄的那个人!狂霸酷帅屌有木有!小帕同学是不是把持不住很有兴趣!」
(哈里森老师历史上肯定不是这么对帕特森说的,不过为了喜剧效果,读起来不累,先这么写了,大意差不多)
如何推测地球的年龄?
《庄子·内篇·养生主第三》里有曰:「生也有涯,而知也无涯。以有涯随无涯,殆已。」
用人类有限的几十年的生命去推算地球的年龄?多么可笑荒诞!人类以为自己是谁?
这种宇宙尺度的对比让人类无比卑微渺小,但是人是一种伟大的生物,虽然人的生命是比瞬间还要短暂,但是人类的大脑可以借助成倍于自己的力量去了解亿兆于自己的这个世界。
这也是为什么物理和科学的永恒迷人的魅力,令人无数人朝闻道夕可死。最后人类的确找到了以有涯求无涯的方法:
20 世纪有个伟大的发现,在几十年里,测量每种放射性元素转变成另一种元素所用的时间,物理学家发现每个不稳定元素的原子,衰变比率是恒定的。
就是说无论周围的环境的改变,这个衰变比率都不会改变。用锤子砸,用油炸,甚至气化,原子钟依旧按照这个定律走的不紧不慢。
哪怕你斗转星移沧海桑田物是人非,从地球诞生到恐龙灭绝,原子时钟精准无比,客观到冷酷,所以要了解我们的地球母亲的年龄,没有比测量铀原子更好的方法了。
例如只要知道了岩石中铀衰变成铅的比率,就可以知道这块岩石存在了多久。
石头里面某些原子具有放射性,它们自然而然发生衰变从而变成其他元素,铀原子首先变成 (Db)原子,平均来说要耗费十几亿年时间。
(Db)原子很不稳定,大概 1 个月左右会变成镤(Pa)原子,然后 1 小时候后又变成其他原子,大概经过 10 次的核转变,来到衰变链的最后一环,一个稳定的铅原子,铅将不再会发生变化。
看似完美的解决方法,但是有个问题:你如何才能得到一块在地球形成之初就存在的岩石?
你走在路边撞到脚的那些的石头可不是地球诞生之初就形成的唉。应该说地球上基本不存在这些岩石了,要不被压碎了,或者被融化了,要不就重塑了,哪里去找和地球母亲同岁的石头呢?
有一个地方能找到,那就是天降礼物:陨石。
只要测量一块几乎和地球同龄的陨石样本里面的铅原子,就能得出地球的年龄了。
芝加哥大学的哈里森·布朗 1947 年首次提出了这个假设,于是就把这个小作业交给了帕特森。
帕特森这个淳朴天真的研究生被老师口盾后,虽然不明白他在说什么,但是他觉得他挺有道理,好厉害!就羞涩的说:「那我试试看吧。」
然后哈里森开心的说了所有老师抓学生干活都会说的那句甜蜜的话:「哎哟,小帕,我相信以你的能力那不是小菜一碟?加油哈!爱你么么哒。」
这是一句很轻描淡写的客套话。但是就因为这句轻描淡写的话,帕特森同学打死都想不到的,这个小小的作业,他的人生发生了重大的改变,世界发生了重大的改变,人类的命运也将要发生巨大的改变。
哈里森老师如果知道接下来三十年后发生的事情,他一定会把「给我一句话,我将要撬动整个人类的历史!」作为他的座右铭。
当然这个小作业对帕特森的人生来说,第一个至关重要的影响是:这个小作业最后不得不成为了他的研究生毕业论文课题,然后坑害了他七年才找到答案完成这个课题,拿到他的博士学位。
为什么这个哈里森认为极其简单的小作业会耗费那么长时间?
是因为帕特森对锆石铅含量做等精度测量时候发现,相同微粒的铅含量的结果数值,每次都偏差很大。
也就是说,帕特森每次测量,锆石里的铅数值都不一样,这可愁坏了帕特森,就像没有了一把标准的尺子,连一个恒定的参照物的数值都没有,如何去测量陨石和地球的年龄?!
帕特森穷尽脑汁,最后发现,影响实验结果的最重要因素,可能是实验室或者空气里存在铅,影响了实验结果(那个时候可是没过滤设备的)。
更何况帕特森所在的实验楼是全学校最烂最年久失修的,锆石里只有几百万个铀原子,空气里的铅数量远远大于这个数值,在这种和空气和环境直接接触样本的情况下显然是没办法测量出正确的结果的。
帕特森随后变成了一个清洁工,拖地擦洗,反复打扫他破旧的实验室,尽量让他的实验室变得无铅,但是最后的结果还是偏差百倍。
帕特森想到了他必须用酸来煮容器和工具,并提纯化学原料,进一步降低实验室中的铅含量,这个过程像我们小时候用搭积木一样,一不小心触碰就倒下重来,譬如万一有个熊孩子或者二货学生打开他实验室的门,问厕所在哪里,那他经常几个月的清洁实验室心血毁于一旦。
无论帕特森如何清洗消毒,都没解决问题。
「易如反掌你妹啊!」帕特森心里奔跑着无数个草泥马问候哈里森。
帕特森想开始设计一种全新的实验室——超级洁净室,但你想他的实验室都如此破旧,哪有人会给他这个经费和机会呢。
这个机会直到他的坑货老师哈里森调任加州理工时候才得以实现,哈里森不知道是不是良心发现觉得坑帕特森坑的有点厉害了,于是邀请他一起去加州理工。
帕特森这个「易如反掌」的课题的研究,已经过去了六年,这六年的岁月他没有能有机会调查到锆石中的铅数值,大部分的时间在坚持不懈寻找,并消灭了许多对仪器造成铅数值影响的源头。
帕特森在真理的大门外,像一个苦行僧,或者说更像是一个劳碌中日的清洁工,洗衣服、扫地、拖地板,把真理大门外的瓷砖清洁了了一圈又一圈,始终无法触碰到真理的大门。
一个人六年的时光就在做这种看似没有意义的事情,重复着实验的第一步,第一步,还是第一步。
在第七年,帕特森终于能完成它的心愿:在加州理工制造出第一个超级洁净室(实验的超洁净室无尘环境概念起源自他)。
他终于能有机会碰到真理大门的门把手了,他终于能有机会测量出锆石的铅含量,也终于能测出当时老师给他的陨石中铅的含量了,他也终于有机会去找到那个「易如反掌」的真理的答案:找出地球的年龄。
在一个夜深人静的晚上,带着加州理工超级洁净室里得到的数据,帕特森来到伊利诺伊州的阿拉贡国家实验室,轻轻的按下了真理的门把手。
真理的的光芒从门缝中透出,帕特森瘦弱的身躯终于进入到了真理的大门,他即将以一个人类的肉身,用对宇宙来说转瞬即逝的光阴,探知到行星、宇宙、地球,和整个太阳系的秘密——地球的年龄。
帕特森郑重的穿戴防护服,按下了按钮「嘿,小家伙,我们要开始气化你(陨石)了」。
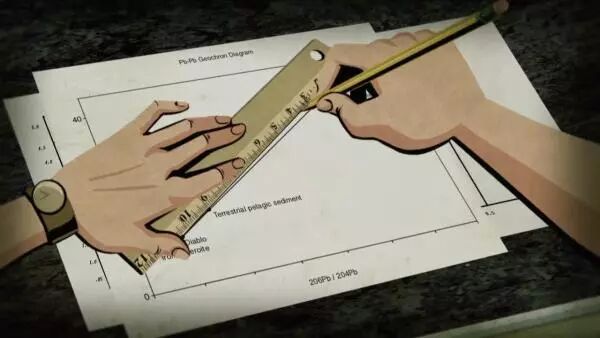
质谱仪利用磁场将要样本中的元素分离,从而使各种元素可以被量化,这就是解开地球真实年龄之谜的最后一环。
(这段影片中动画和音乐处理的极其感人,当时我就 QAQ)
边做着数据,帕特森边喃喃自语到:
「感谢所有做出过贡献的科学家们」
「感谢地质学家们」
「感谢查尔斯 · 莱尔」(著名地质学家 均变说的重要论书者)
「感谢迈克尔 · 法拉第」(发现电磁感应)
「JJ· 汤姆森」(发现电子)
「欧内斯特 · 卢瑟福」(核物理之父)
帕特森眉毛一扬:「也感谢哈里森 · 布朗」(他的「坑货」老师,研究如何分开环和铀)
帕特森飞快做着计算……
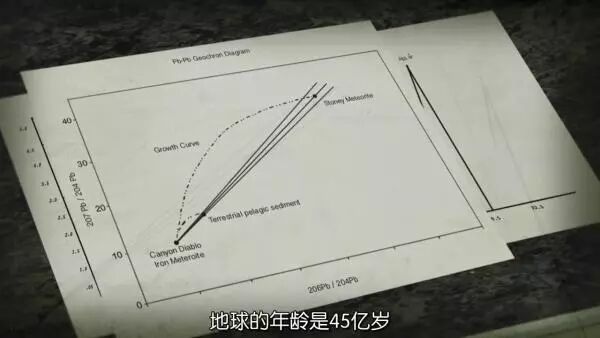
当他画下最后一根线时候,他轻轻的说:
「地球的年龄是 45 亿年」
「我们成功了」
当知道地球年龄后,帕特森像个孩子一样奔向爱华达州母亲的家,他想把他七年获得的成果和他母亲分享——地球的真实年龄。当然,由于太过激动,心跳如此的剧烈,被送到了医院进行抢救。
帕特森打开了真理的大门,这项发现为他带来什么奖励么?
你说诺贝尔奖?
当时诺贝尔物理和化学奖都没有兴趣投给新兴的交叉地质学领域,物理的评委不认为他的研究属于物理,化学的评委也不认为属于化学。
45 亿年这个数字,直到十几年后才放进地质教科书中,即便如此,在过去 30 年中超过 50 本教科书中,只有 4 本在提到地球年龄这个数字时候提到帕特森这个名字,据说有的书还拼错了他的名字。
他只是个贫穷的小讲师,更要命的是,为了全身心投入研究,无暇参与终身教授的职称申请,这却严重影响到了他的后面的人生。
真理的价值从来不是用金钱来衡量的,也不是任何东西能够奖励的,真理的价值可以说等于零,万物之始,通往终极,人类从来不拥有真理,只有少数人能窥探真理的一角。
但是真理还是恩赐给了帕特森一个东西作为天大天大的奖励,是什么奖励呢?
一个超级天大的麻烦。
他当时并不知道,自己的这项耗费 7 年,看似对 99.999999% 的人来说完全没用的研究成果,妨碍了某些世界上最有权势的人。
当然帕特森更不知道,在他还是那个研究生,答应哈里森那个「易如反掌」的作业时候,已经手握那个红色的按钮,将要选择是否拯救人类。
当然,对帕特森来说,他在无意识中拿到红色按钮的瞬间,早就毫不迟疑按下了那个「YES」,因为帕特森就是这样的人,一分钟一秒一瞬间都不用怀疑,帕特森就是这样的人。
「最有权势的人」是谁呢?
有的人会猜是不是宗教势力?得知地球的年龄虽然的确让帕特森收到许多神创论者的抨击,不过现在 20 世纪毕竟不是布鲁诺的时代,何况帕特森那么没存在感,所以答案不是宗教。
在美国,最有权势的人不是政客和总统,而是那些财阀和巨头。帕特森得罪的「最有权势的人」,就是美国的整个铅工业和石油工业的巨头。
他们自然对地球的年龄有 45 亿年这种废话没有一丝一毫的兴趣,让他们惶恐的是帕特森的研究过程以及所使用的研究工具——铅,帕特森知道了一个他不该知道的东西。
土星,Saturnus,这个单词在古罗马是农神、;萨图尔努斯,罗马最古老的神祇。农神之外还有一个含义:「GOD OF LEAD,铅神」。(有兴趣可以查炼金术与天文学相关的文章,很有趣)
古罗马人对铅有极为狂热的追捧,这种奇妙的金属萌萌哒,它制作的器皿,光亮闪烁,不像铜器那样产生令人讨厌的绿锈;
贵族们爱喝的葡萄汁中若加上这种金属粉,可以除掉酸味,还可使酒醇香而甜;
人们发现饮用用铅容器喝水,水有一种「迷人的甜味」;
铅还有止泻的效果,当然对爱美的人来说,这种金属粉制成的化妆品,可让贵族夫人们的皮肤更白……简直是神恩赐的最棒的东西!!
当我们现在阅读到这些文字,脑海里浮现出这几个字:古罗马人集体选择奔向脑残。脑残不是一个形容词,而是确确实实,铅中毒带来的全身性致命神经毒害。
当然罗马人在铅上干的最脑残的一件事是:「水管」这个单词 Plumb,来源自拉丁文的铅。
罗马人居然脑残到了拿铅去造引以为豪的罗马地下管道!!!现在想想,如果放到现在,这是多么宏大壮观又富有深谋远虑的慢性集体杀人方法。
有许多文献专门研究罗马帝国的灭亡和铅中毒之间的重要关系,这里不再累述。
我们吐槽罗马人疯了!用铅做餐具和水管!其实更可怕的是,在帕特森所在的 20 世纪中叶,公众对铅的理解和古罗马人没啥两样。
当然我这里说到是「公众」,铅对人体巨大的毒害的认识,人类早就已经开始了解,但是为什么明知铅有毒还要使用?
是因为铅便宜、好用、延展性好、制造简单,而铅中毒是需要一个累积过程的,而能接触到这些计量的,往往是矿工和处理铅的工人。
这些人的性命?WHO CARE?他们是社会最低贱的人,铅的好处我来享用,铅的危险让他们来承担!
即便是现在,我们还是这样的「公众」,我们对皮革处理化学中毒的工人毫不在意,对吸入粉尘得了矽肺无药可医活活闷死的矿工选择视而不见,他们的性命毫不重要!
进入 20 世纪,有一个重要的产业发展了,那就是广告业,含铅油漆厂商们雇佣刚萌芽的广告业者向消费者灌输铅对儿童是无害的。
当然这看起来影响不是很大,但是资本的逐利可以泯灭良心,科学家也不例外。
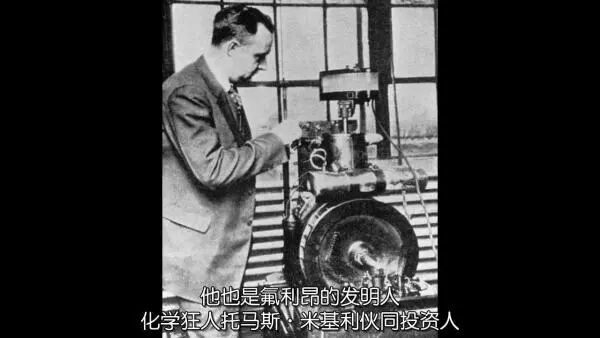
后来成为美国化学会主席和拥有「地球史上对大气影响最大的生物个体」、「历史上杀戮最多的个体」这两个华丽丽闪瞎人头衔的氟利昂的发明者:托马斯·米基利,伙同通用汽车老板查尔斯·凯特灵,将四乙基铅,作为抗爆剂为噱头添加到汽油中。
(发动机有爆震现象,93 号和 97 号汽油的差别不在于纯度,而是辛烷值的差别,这个问题其他知乎答案有提到)
四乙基铅和普通的铅不同,它更具致命性,皮肤接触半杯就会致命,虽然公众对神经毒素爆发发狂而死的乙基公司工人毫不在意,但是为了利益,宣传的作用就体现了。
这时候,不再是广告报纸和儿童画,他们动用了至今屡试不爽的方法:他们需要一个懂科学的权威,安抚民众,提升铅的形象。
他们找到了一个合适人选,罗伯特·基欧博士,这也是人类第一次,利用科学权威来掩盖对环境和公共健康的威胁。
基欧博士说:「铅本身就存在自然环境中!当然,虽然对一线工人有影响,但是对公众绝对没任何影响!并且没有任何证据表示铅对公众的影响对不对!?这种程度铅就如同 12 月的雪一样的自然,不会污染环境!」
几十年来,没有人反驳过他们一句。
直到那个傻傻的克莱尔 · 帕特森开始研究,地球的年龄。
当时帕特森也和普通科学家一样,认为铅是自然普遍存在的,然而作为像他那样的科学家,比别人多走了一步。
在对实验室铅干扰排除的过程中,他开始研究铅是如何传播的,依靠美国石油组织的科研拨款,他仔细研究了海水中深层和浅层中铅的含量(真是个巨大的讽刺)
帕特森又一次发现他的原始数据无法解释了:深海中铅只有少部分,但是在浅水和水面上,铅的含量高出几百倍。
帕特森发现了一个惊人的事实:浅层海水中这些铅是近年才出现的。那什么能给全球的海洋带来那么多的铅?
帕特森和他的坑货老师哈里森在偶然中谈起这个问题,帕特森提出了他的假设:哈里森,我了解这些铅是哪里来的,它来自含铅汽油。
哈里森听完沉默了许久,然后说:Well,小帕,这个有点麻烦了,因为我们所有的研究资金都是从他们(石油组织)那里来哒。
帕特森也沉默了,他明白自己即将做一个重要的选择,当然他毫无疑问做出了那个选择:他立即着手发表学术论文,对含铅汽油做出讨伐。
这个选择意味着什么呢?三天之后,当他回到家,发现家里早就有数个西装革履,皮鞋锃亮的黑衣人在等着他。
「Dr 帕特森,很高兴见到你,你的研究成果很惊人,你有什么需要我们的赞助么?」
「我……我想有机会去极地获取冰心,来研究远古时候的铅含量……」帕特森说
黑衣人眉头一皱,冷笑:「铅?你的工作已经结束了,是时候去研究别的元素了,实际上我们有能力去资助你无限制的去研究其他方面,是无限制的。」
「铅是一种神经毒素,当你们从工厂里运输出来的时候,等于在运送化学武器,你们觉得这些铅从排气管中排出后去了哪里呢?想想这会对我们和我们的后代产生什么影响?你要把上百万吨的毒气排到我们呼吸的空气中么!!就算我的研究不能使你们停产,以后还有科学家能够做到!」
帕特森的激动让这次威逼利诱不欢而散,看到这里,我原本以为石油巨头会选择暗杀方法来干这种硬骨头,不过看起来他们处理问题还是比较「文明」的,或者说是让帕特森比死更难受。
如果他选择屈服,向石油业投降,他可以回到自己学热爱的学术领域,拥有无限的资金继续研究。
首先,来自石油行业的赞助一夜之间消失的无隐无踪,意味着帕特森所有研究被迫中断。
更要命的是我之前说过,帕特森终其一生都专注于研究,无暇顾及申请终身教授,也就意味着他这个可怜的技术岗位人员,能被人随时踢走,卷铺盖走人,毁掉他作为科学家的一生。
而加州理工的董事会里,就有好几个石油巨头,他们不断的施压给帕特森,并不断怂恿董事会让他滚蛋。
帕特森是那种越不让他去研究,他就越要去研究的科学家,这种固执,也造就了为什么他能七年时间,只为了寻找一个答案「地球的年龄」。
为了调查铅,他的人生足迹遍布从格林兰到大西洋,他来到南极向下挖掘 200 公尺,找到冰心,通过对冰锥中几百万年前气泡中空气的研究,帕特森发现现在空气中铅含量是过去的几百倍。
在对地球年龄的研究中,帕特森无意中发现了一场规模空前的毒害污染的证据。而被工业巨头雇佣的科学家们,却对公众说「不用担心」。
所有人都认为帕特森是一个骗子,帕特森耗尽数年,不断的把论文和成果投向杂志和寄给政府高官。
终于,在一名州议员的帮助下,政府于 1966 年主持了关于铅的听证会,为了干扰听证会,巨头们特地运作,把听证会选在了帕特森在南极洲的时间。但他出人意料的在第五天出席了。
听证会上,石油公司的律师不断咆哮:基欧博士是这个领域最权威的最有经验的,而他,帕特森,他什么都不是。
他们一再强调和鄙夷帕特森只是加州理工学院的一名小小的技术员,在圈子里没有任何实际的学术地位。
如果在电影中,剧情结尾,应该像是《永不妥协》那样,帕特森慷慨激昂,法官落锤,判决石油公司败诉,然后所有参与这场斗争的人相拥在一起。
或者是想电影《辩护人》那样结尾,有一百多个律师和科学家站在帕特森的背后,随着点名起立,让人热泪盈眶。
人们总喜欢看一个英雄依靠一己之力,对抗邪恶的巨头,拯救世界。
然而在现实中,帕特森这样的普通人不会像超人那样双手一举,停止前进的火车。
帕特森所做的,却是紧紧拽着火车,用尽所有的力气,用那一点点微不足道的阻力,努力让火车停下来。这些阻力相比火车巨大的惯性和动力,显然微不足道,
但是却在一点一滴中使火车慢了一些,然后再慢了一些,经过漫长的时间,这辆发疯的火车终于停了下来,但是帕特森和石油公司斗争了 20 年,在 80 年代,铅才被禁止在美国消费品中使用。
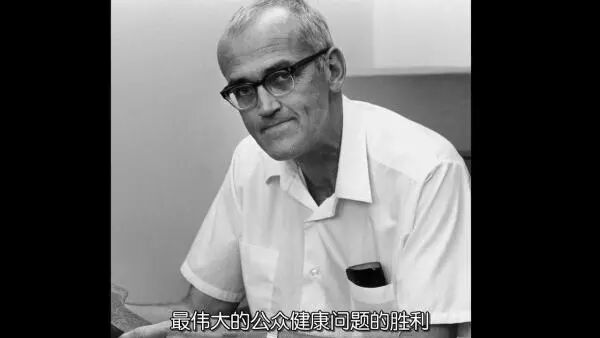
这位找出地球年龄的人,同时也造就 20世纪,最伟大的公众健康的胜利。
短短几年,美国人血液中的铅含量降低了 75%,数百吨的毒气被禁止投放在我们日夜呼吸的空气中。
我们现在实在无法想象,如果汽油和日用品没有无铅化,那对人类平均寿命有什么致命影响,可以说帕特森间接拯救了无数人的生命。
几年后,帕特森死于哮喘,据说他因为哮喘需要长期使用激素,骨质已经完全疏松,身高也缩短了 5 英寸,后半生在病痛的折磨中,与石油巨头对抗。
如这一集的结尾,主持人说:
「现在,科学家又发出了其他环境的警告,既得利益集团依然雇佣他们自己的科学家继续混淆视听,但是到头来,大自然是不会被谎言屈服的。」
知名的地质学家甘特·福尔评价:「帕特森是一个圣人,他取得的成就应该是牛顿以下,伽利略以上」。
然而直到如今,提到克莱尔 · 帕特森,绝大部分人都不知道这么一个伟大的英雄,他低调了一辈子,甚至据说在某期《自然》杂志上,名字被拼错,被当做了女人。
在帕特森开始他的人生之前,或许命运和真理曾经问过他这些个问题:
你将要为一个不经意的问题的答案耗费你的人生,这个答案对大多数人来说毫无意义,它除了给一瞬间的机会窥见真理,但却不会给你带来任何名利,相反,你会得罪世界上最有权势的人,和他们周旋到底,你将在贫困中度过你的一生,你的成果将要十几年后被确认,然而大部分人依旧视而不见,你的名字不会被人们咏唱,但是如果你穷尽一生坚持维护真理,命运会对人类肃然起敬,稍稍给予他们所有人生命延长的契机。
在四十多年又七个月以来的日日夜夜,帕特森他早已准备了答案:
最伟大的科学家总是抛弃那舒适的生活只为一丝照亮未来的光芒去践行那看似不可能的道路是什么使得他们前行因为在科学的处女地能发掘到人生的美和意义于是他们甘心被它奴役守护着人类的命运——克莱尔 ·C· 帕特森1981 年 8 月 23 日
看了那么多动画的帕特森,来张真人版的,其实和动画里做的挺像的是不是!瘦弱,孤傲,以后有人指着问这个人是谁?请你一定要回答:这是一个不经意拯救人类的英雄。
后记
最初看到这个问题,很想简短的写一条答案:
美国科学家克莱尔 · 帕特森,无意中研究七年终于发现了地球的年龄,但是又无意中用的铅测法不小心触碰了石油巨头的利益,他奋斗终身终于使得汽油无铅化,把铅赶出了地球,间接拯救了无数人的公众健康和生命。
但是觉得这样太轻描淡写了,像这么写的话,帕特森这个人估计许多人看完这句话后,回过神又忘记他的名字,当我知道帕特森的故事后,每当走在路边,看到车流如梭,汽车的尾气有节奏的喷吐的,仿佛在说:前进、前进、前进!!
没有人知道汽车尾气和地球年龄两件风马牛不相及的事,居然有那么深的交集,甚至改变了世界。
伟大的英雄应该被传唱:「我们人的力量多么渺小,人的力量又多么大,人这种生物,还是挺了不起的。」
有的人觉得一个人拯救世界,是一个伪命题,因为历史和时间是水流,人只是河流中游泳的人们,无论人们调转船头还是奋力拍打船头,只是在历史的长河中挣扎,并不改变历史的流向,没有帕特森,迟早有其他科学家出来让人类修正铅在工业中错误的应用。
这种观点很有道理,但是弗洛文奇有句话我非常喜欢:「每个种族都会遇到这个时刻:这个种族是备受奴役还是走向辉煌,只取决于该种族的某一个人。」
我还是相信,不断有人,真的在历史节点,偶然改变了人类的命运,拯救了世界。
Subscribe to:
Posts (Atom)